The need for scaling applications based on demand and usage has given rise to infrastructure services like kubernetes(K8s) and serverless paragidm (includes serverless functions). Intially, the applications were built with a single infrastructure in focus. Either it was instances only with auto-scaling or kubernetes environment or pure serverless applications. But as the application architectures’ have evolved, the services are being deployed across a combination of environments like kubernetes plus serverless functions or instances plus kubernetes.
In this blog, I will focus on configuring and deploying a microservices application across Azure Kubernetes Service and Azure function.
In this blog, I will review:
1. Introduction to Azure Functions
2. Configuring and Writing Azure Functions
3. (Re)Architecting for Serverless functions
4. Integrating with application services running on K8s
Introduction to Azure Functions
Azure functions is an event driven compute platform similar to AWS lambda. While AWS Lambda has just one hosting plan (deployment model) which is fully managed and deployed on AWS propreitary backend. Azure functions takes a slightly different approach to this. It provides with various Hosting Plan options.
a. Consumption Plan - This is similar to the AWS Lambda model. It is fully managed and has no fixed-cost or management overhead with it. The downside of this is that there might be some delay in start up of the function if it has been idle for a while.
b. Premium Plan - It provides pre-warmed workers with no delay even if the functions were idle. It achieves this by reserving capacity for your functions. With this plan you can also deploy the functions within your Virtual Network (VNET) for private access and unlimited execution duration. This plan also allows you to run these functions as docker container on kubernetes. The downside is higher cost.
c. Azure App Service Plan - This plan provides predictable pricing for those organization who are very price sensitive. The downside is that it has limited auto scaling behavior.
In AWS Lambda, the functions receives a JSON object as an input and can return a JSON as output. With Azure functions, you can add triggers and bindings. A trigger is the event that the function will listen to. Once the data is processed by the function, it can push the data to an output source which is output binding. All triggers and bindings have a direction. For triggers the direction is always in. For input and output bindings you can use in and out.
Now, let’s look at how to configure and write Azure functions.
Configuring and Writing Azure Functions
In this example, I will be using the Acme Fit Demo app. This app has 6 sevices - Front End, Users/Auth, Catalog, Cart, Order and Payment. I will modify the cart service (Python) from containerized application to Azure Functions (With Consumption plan). The rest of the services will be deployed on Azure Kubernetes Service(AKS) cluster.
Architecting for Serverless functions
There is an ongoing debate in the serverless community on how to structure your serverless application. But there are 2 main schools of thought:
1. Bundle as many functionalities as possible within a single function.
2. Every API route should be it’s own function.
While there are pros and cons to each method, I will use method 2. This primarily because when the functions would need less time to warm up and start (less code and libraries) and also makes it easier to handle request and not overburden only 1 single function.
I have decomposed the CART service, API routes into multiple functions, namely:
- addCartItem
- clearCart
- getCartItems
- getCartTotal
- modifyCartItem
Each of the above functions corresponds to one of the CRUD operations on Cart items.
You can find the Azure Functions code here.
Configure Azure Functions
To configure the function, you can either use the Azure Portal or the Azure CLI. I will use a combination of the 2 to explain the setup process better.
1. Navigate to Azure portal [LINK HERE] and then select Compute > Function App.
Then click on Create.
You will also notice other hosting options, but for the purposes of this blog, I will be using the consumption plan. You can also enable Application Insights under Monitoring tab. Click on Review and Create.
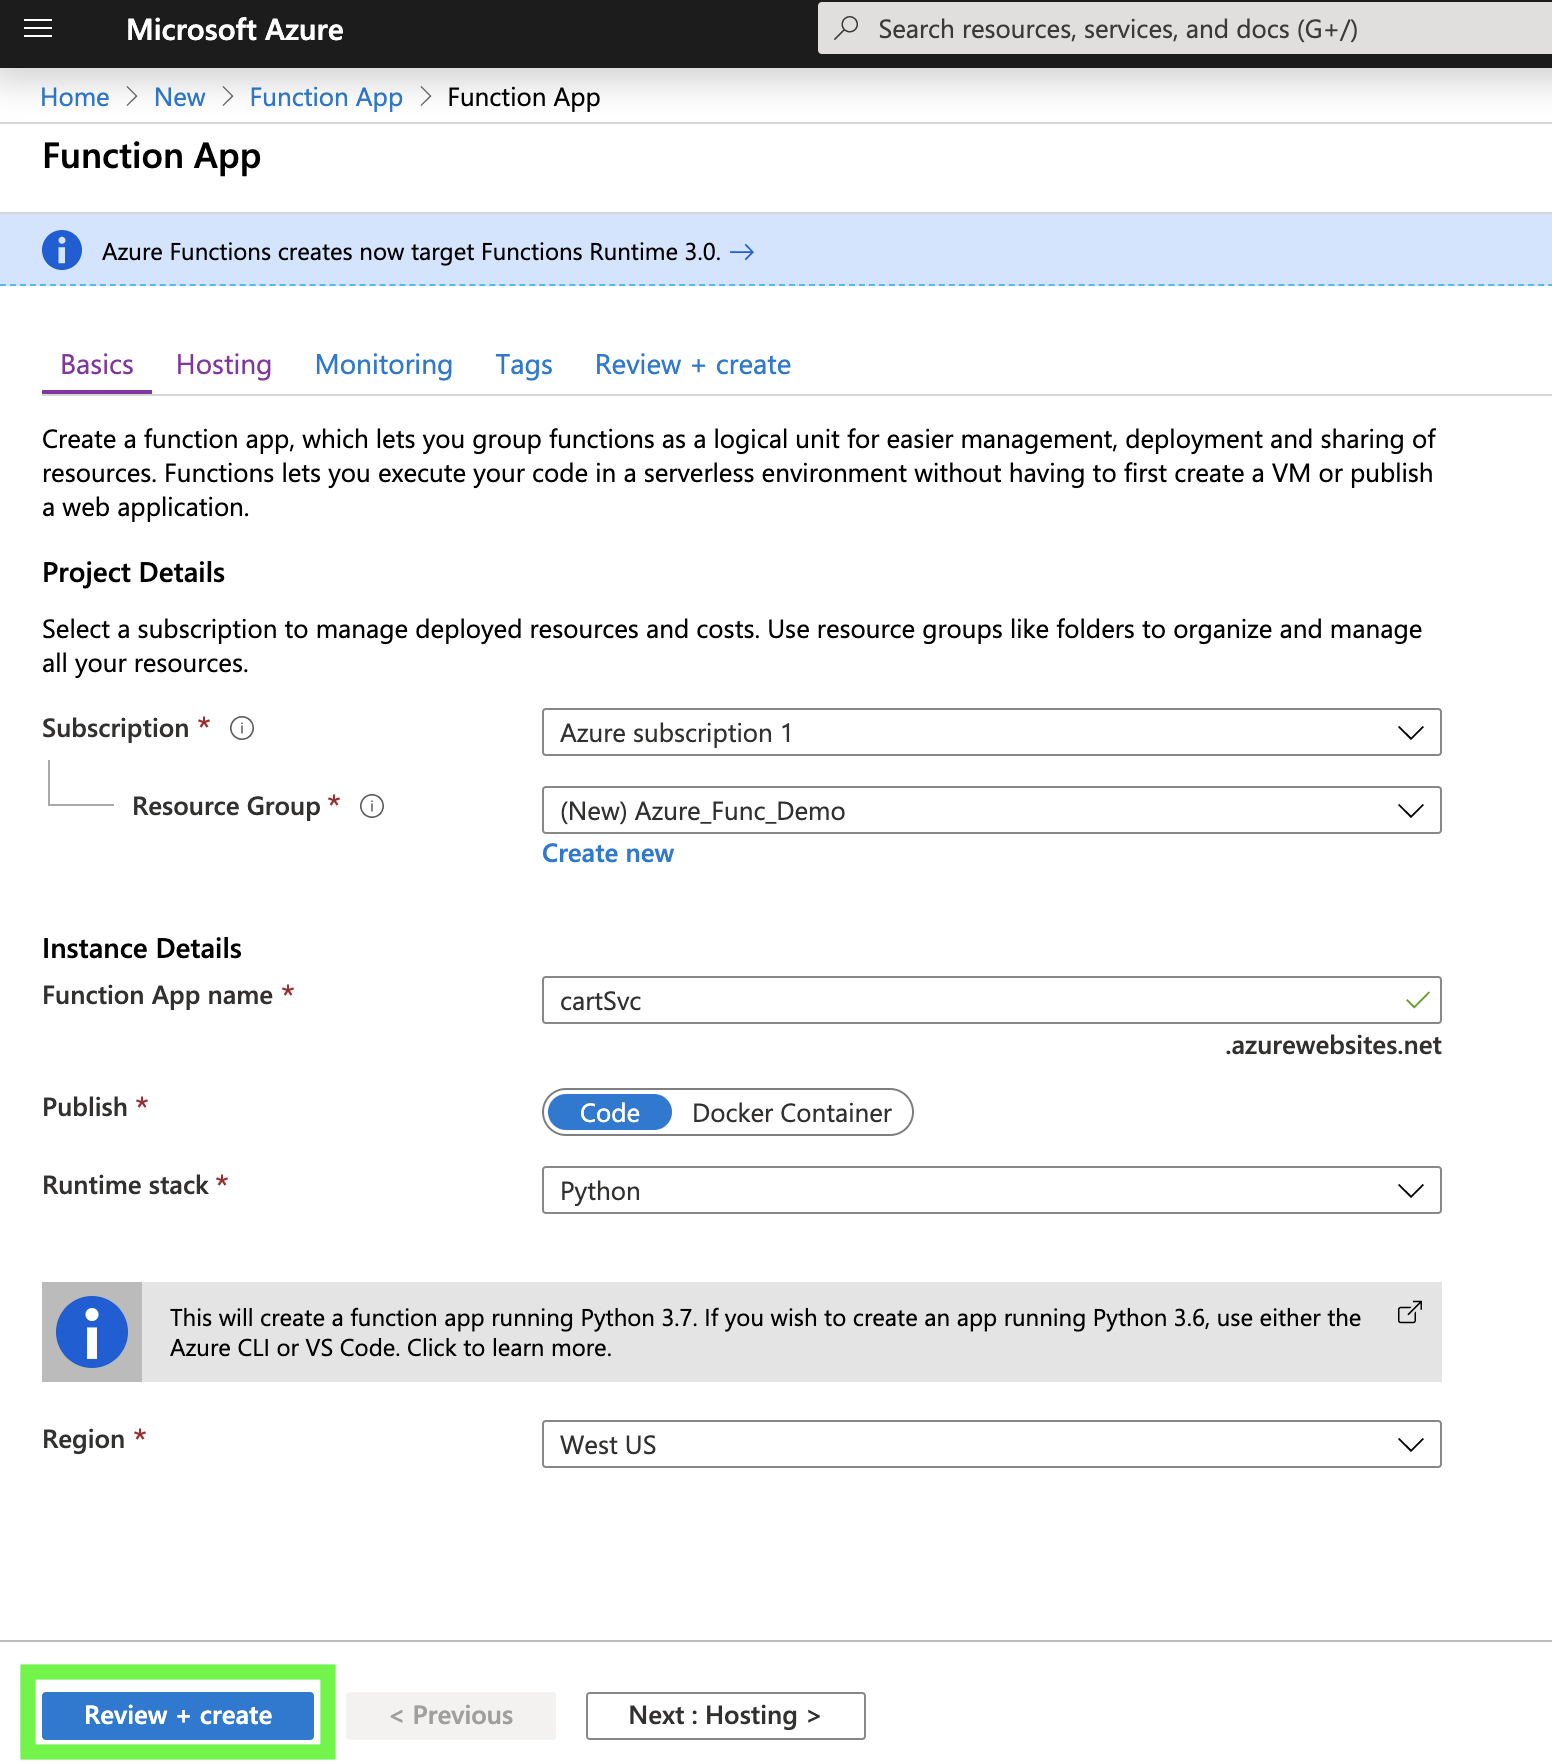
After this verify the summary again and click on create.

2. I have selected python as the language for writing the Azure Functions. Most of the functionalities for creating and managing python based azure functions have to be done from the CLI, as of Jan 2020.
To get started with this, these are the following pre-reqs:
- Python 3.7.4 - 64 bit. (Python 3.7.4 is verified with Azure Functions; Python 3.8 and later versions are not yet supported.)
- Virtual Env (Recommended not mandatory)
- The Azure Functions Core Tools version 2.7.1846 or a later.
- The Azure CLI version 2.0.76 or later.
3. Activate the virtual environment and initialize the function with the same name used in the Azure portal.
python -m venv .venv
source .venv/bin/activate
func init <Azure FUNC NAME> --python
4. Create a new function with a reference template. In our case, we will leverage the HTTP trigger template.
func new --name addCartItem --template "HTTP trigger"
This will create a new directory with the function name, init.py file and a function.json file.
The directory structure should look something like this after ALL the functions have been created.
├── LICENSE
├── README.md
├── addCartItem
│   ├── __init__.py
│   └── function.json
├── clearCart
│   ├── __init__.py
│   └── function.json
├── getCartItems
│   ├── __init__.py
│   └── function.json
├── getCartTotal
│   ├── __init__.py
│   └── function.json
├── host.json
├── local.settings.json
├── modifyCartItem
│   ├── __init__.py
│   └── function.json
└── requirements.txt
The init.py contains the main() function for python. This file is triggered based on the description in the function.json file as shown below. The function.json is a config file that defines triggers, input and output bindings (Discussed in previous sections)
{
  "scriptFile": "__init__.py",
  "bindings": [
    {
      "authLevel": "function",
      "type": "httpTrigger",
      "direction": "in",
      "name": "req",
      "route":"cart/item/add/{userid}",
      "methods": [
        "post"
      ]
    },
    {
      "type": "http",
      "direction": "out",
      "name": "$return"
    }
  ]
}
The config file above instucts the Azure function to be triggered on a HTTP call with POST method to the route, “cart/item/add/{userid}". It also defines which file needs to be triggered upon invocation. In our case it is init.py. You can modify the trigger to a webhook by updating function.json to the following:
{
  "bindings": [
    {
      "type": "httpTrigger",
      "direction": "in",
      "webHookType": "github"
    },
    {
      "type": "http",
      "direction": "out"
    }
  ]
}
5. Once this is done, add your code under the main() function in init.py file. Check this repo for sample code. You can copy and paste one of the functions to see it in action.
Also, update the host.json under the root folder for the project, if needed. The Azure functions will by default append /api to your function URL. In my host.json configuration below, I have removed the route prefix.
{
  "version": "2.0",
  "extensionBundle": {
    "id": "Microsoft.Azure.Functions.ExtensionBundle",
    "version": "[1.*, 2.0.0)"
  },
  "extensions": {
    "http": {
      "routePrefix": ""
    }
  }
}
6. Next step is to test the function locally. Just run,
func start
Copy the URL displayed and test it using POSTMAN or curl.
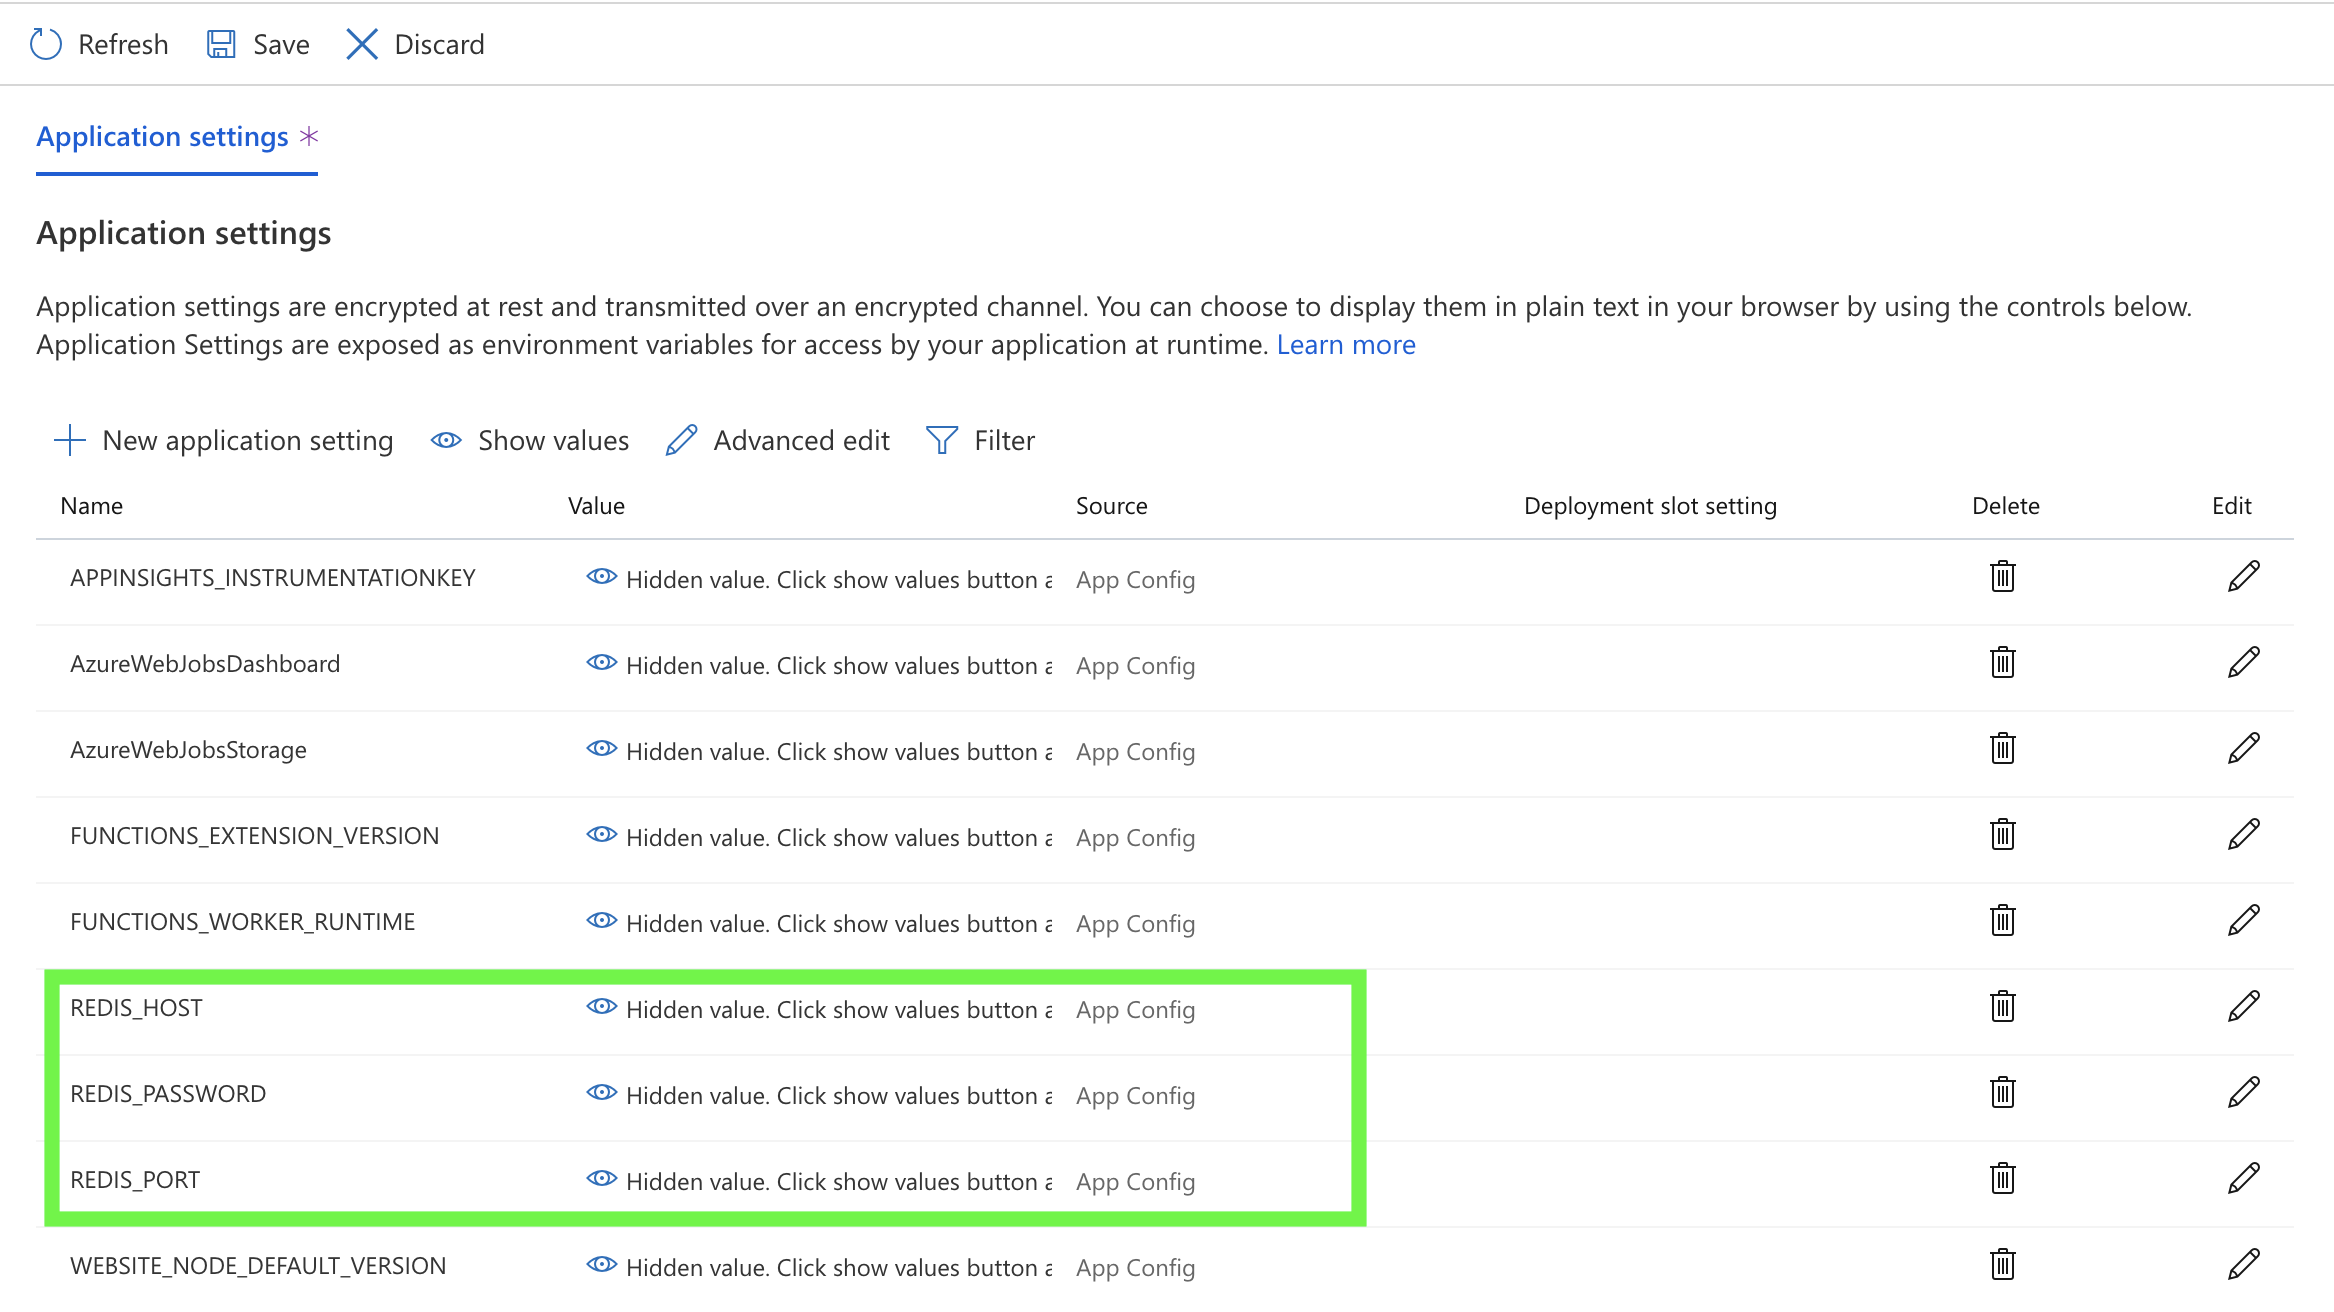
7. In some scenarios, your app might be interacting with other services like Databases. In case of the cart service, I am also using Azure Cache for Redis.
For the functions of cart service to work, they would need access to the REDIS_HOST, REDIS_PORT and REDIS_PASSWORD environment variable.
You can set these variable in the Azure portal. To do so, Navigate to the FUNCTION > Configuration and under Application Settings you may add these variable names and their values.
For local testing, you can set the env variable on you local system or use the local.settings.json
NOTE: If you are adding any kind of secrets to the local.settings.json file, remember to add it to .gitignore file.
8. Once the app is tested locally, you can push it to Azure.
func azure functionapp publish <FUNCTION APP NAME>

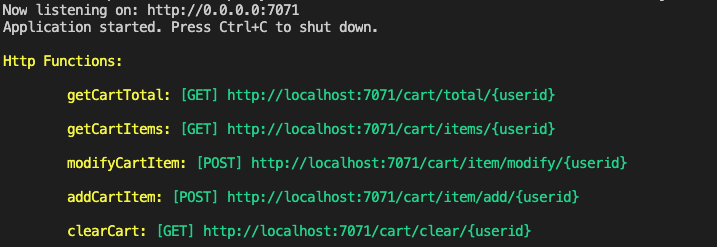
Function URLs after publishing to Azure.

Integrating with application services running on K8s
Use the URL generated in previous section within your app. Notice that all of these functions have an additional parameter named "code=<SOME CODE>". This is the default code that is generated for your function. You can add or update this code within Azure portal under FUNCTION_NAME > Manage > Function Keys.
This keeps the function URL safe from unwanted API calls and acts as additional authorization.
The front-end service in ACME Fit Demo app, routes the traffic to other services like user, cart, catalog and others. When deployed on AKS the front-end can route traffic based on app labels and dns of the service except for the Cart service. As our cart service is deployed as function, we need to explicitly provide the endpoint for the Cart service. Additionally, the function key (the code=) param for every function must be passed to it.
Conclusion
Serverless paradigm is gaining a lot of traction because of it’s ease of use and low cost of maintenance along with scale. When using heterogenous infrastructure, one has to ensure reachability and availabilty of these services at all times. Complexities usually arise because of permissions issue as well as network connectivity. With Azure functions, there are various hosting plans available to handle each of these scenarios.